Wednesday, 8 March 2017

Bag Making For Beginners Part 1 - How to print off and put together a PDF Pattern

In part one of my Bag Makers for Beginners series, I would like to show you how to accurately print off and stick together a pdf pattern so that it is the correct size.

Getting your pattern the right size is essential, if you print it too small, your bag will be too small, print it to big, your pattern will be too big and the pattern pieces may not fit together as the designer intended

For the purpose of this tutorial I have chosen to use the Ethel Bag by Swoon Patterns, not only is it a free pattern, but it's also a great pattern for beginners, simple in construction, yet the finished result is a great looking bag

This is my Ethel 


Step one
Once you have purchased your pattern and downloaded it, open it up (almost certainly using Adobe Reader).

Begin by printing the test square page.  All pattern designers include a test square to ensure that you print the pattern to the correct size.


For Ethel, the test square is 3 inches.  Find this page in the pattern and select Print and when the dialogue box comes up make sure you check the "Actual Size" option.  I also check the "Print in Grayscale (Back and White) option too because it saves on ink and prints quicker


Once printed, check with a ruler that the box is indeed 3" x 3" in size.  If yes, then you can carry on printing the remainder of your pattern.

Step 2
Cut out your pattern pieces using the black line as a guide, make sure you are really accurate 


Step 3

Join the pieces together with tape - again be really accurate, butt up each piece and match the letters or sometimes shapes 


A lot of patterns including Ethel are designed so that you cut out your fabric on the fold


I prefer to print 2 sets of pattern pieces and tape them together so I have the whole pattern piece.  I find this is more accurate when cutting out my fabric, and it's really useful when it comes to pattern matching your fabric
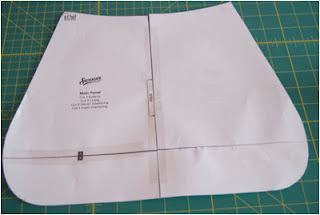

Once you've taped all your pattern pieces together, you'll be ready to cut out your fabric


Tuesday, 7 March 2017

A Boxy Pouch, a free pattern and tutorial

Boxy Pouch by Sotak Handmade

This would make an ideal pencil case, make up case or even a handy storage pouch for your sewing tools


Finished Size 7" wide x 2" tall x 3" deep


Heart Backpack, a FREE pattern

I love this Heart Backpack pattern by  Sewmuchado.com, so pretty and the pattern is FREE


Ciara Clutch PDF Pattern - FREE

A free pattern from ithinksew.com, the Ciara Clutch 


Finished Size 14" wide x 11" tall

Follow my tassel tutorial to make a tassel for your Ciara Clutch 

Thursday, 2 March 2017

How to make a handbag tassel

I am excited to announce that Bobbin Girl is now selling tassel caps so you can make fun tassels to match your handbags.

I made this one for my Selena Tote, it only takes a few minutes yet the affect is really satisfying


Tools you will need:

1 piece of faux leather or matching fabric for your bag (I used a piece 4.75" wide x 3" tall to fit the tassel cap snuggly when rolled up)
Metal tassel cap
An awl or some other sharp tool that will fit through the screw hole on the cap
Pen
Small Screw Driver
Pair of scissors
Wooden stick or something similar to ease the tassle roll into the cap
Glue - I like to use Fabri Tac


Step 1
Cut and measure your piece of faux leather or fabric 4.75" wide x 3" tall

Step 2
On the wrong side of your faux leather or fabric, draw a line 1/2" from the top edge


Step 3
Cut the fringe of your tassel, up to but not past the 1/2" line.  My cuts are approximately  3/8" apart but you can cut them as thin or thick as you want (just remember, the thinner they are, the less strong they are)


Step 4
To test that your tassel will fit into the tassel cap, roll it up tightly along the top and insert it into the tassel cap.  If you have trouble getting into the cap, unroll the tassel and trim the width a little bit


Step 5
Unroll the tassel and add glue all the way across the top
TIP don't use too much glue otherwise it will seep out when you roll the tassel back up


Step 6
Put some glue (again not too much) into the tassel cap itself

Step 7
After adding the glue, roll your tassel back up, again as tightly as you can, insert it into the tassel cap - I used a little pointed wooden stick to ease it into the cap until I felt it was secure


Step 8
Use an awl or similar sharp, pointed tool and poke it through the small screw hole in the side of the cap - push it in as far as possible as this will help the screw go into your faux leather more easily

I got the screw started by hand before using a small screw driver to screw it in place. Your tassel is now complete, hang it from your bag with pride because you made it!!


Tuesday, 28 February 2017

Sewing with Harris Tweed

I'd had a couple of metres of Harris Tweed in my stash for months (I've now got more !!!), but felt really nervous about cutting into and sewing with it, partly because it's quite expensive (average £22 per metre) and also because I'd heard it frays. For ages I sat back and admired all the Harris Tweed creations I saw on Facebook and one day, only recently, I took the plunge!


I decided to make a relatively simple bag by Swoon Patterns called Lola, I felt she would look really cute in Harris Tweed plus I could use the leather handles I sell in my Bobbin Girl shop too.
Before I cut anything out, I fused woven interfacing to the back of the tweed, I'd read that it reduces fraying and I have to say, it absolutely does. I cut out Lola with little or not fuss and proceeded to make my first Harris Tweed Bag.  I used Pellon Flex Foam for the interlining and a 4.5 long pull zip and hardware from the Bobbin Girl Shop 
I have to say, I was delighted with the outcome, and being proud of my creation, I shot round to my neighbours Sylvia first, then Betty, to show it off. Sylvia liked it a lot but Betty loved it and at 90 years old, I have to say Lola really suited her. Betty asked me to make her one but as her 91st Birthday was rapidly approaching, I decided I'd give it to her as a Birthday present. After much protestation and offers to pay me, Betty finally accepted my gift and now Lola is hers.
Hot on the heals of my new found confidence in sewing Harris Tweed, I've now made another bag, this time an Everyday Tote, pattern by Bagstock. I used a combination of Harris Tweed and Faux Leather and Tula Pink for the lining.
Harris Tweed is readily available to buy from a number of weavers on the Isle of Lewis, Shawbost, Lil Shop of Harris Tweed, Christina's Harris Tweed, are just 3 of them.
Every time you make an order, the weaver sends you some Harris Tweed labels to sew onto your bag - to give it accreditation that your product is made from genuine Harris Tweed and if you plan to make lots of Harris Tweed products, you can apply to buy more labels and hanging tags from the Harris Tweed Authority, you need to provide receipts that you have purchased at least 10 metres before they will set you up an account. You can have a maximum of 1000 labels per year but don't panic, you don't have them all at once. Contact HWA for application form and tag prices.

Tuesday, 14 February 2017

Bobbin Girl in Issue 4 of Bag Making Essentials Magazine

We did it again, Bobbin Girl Bag Making Supplies made it into issue 4 of Bag Making Essentials magazine, this time not only did my Top Tip when bag making make the issue but I was also hired to write a tutorial on how to insert piping.

Piping is something I avoided for ages, I admired it from afar on all the gorgeous bags I saw on Facebook and Instagram, where piping had been used with great abandon, until one day I decided to have a go myself. I'm not going to lie, there's a definite knack to it, but as with everything else, practice makes perfect.

I'm a bit lazy, I tend to use ready made piping which I sell in lots of colours in the Bobbin Girl shop, but it's also very easy to make, just cut fabric strips on the bias, wrap your piping cord in it and sew really close to create a tube of piping with a flange.

If you would like to read my tutorial on how to insert piping, to give your bag that extra pop of colour, not to mention a more professional look then pick up the magazine in major W H Smiths shop and supermarket chains.  You can also order it on line from Moremags.com