Getting your pattern the right size is essential, if you print it too small, your bag will be too small, print it to big, your pattern will be too big and the pattern pieces may not fit together as the designer intended
For the purpose of this tutorial I have chosen to use the Ethel Bag by Swoon Patterns, not only is it a free pattern, but it's also a great pattern for beginners, simple in construction, yet the finished result is a great looking bag
This is my Ethel
Step one
Once you have purchased your pattern and downloaded it, open it up (almost certainly using Adobe Reader).
Begin by printing the test square page. All pattern designers include a test square to ensure that you print the pattern to the correct size.
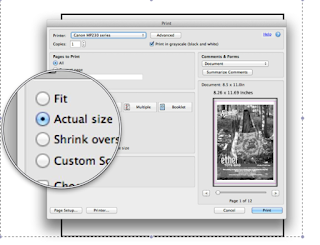
For Ethel, the test square is 3 inches. Find this page in the pattern and select Print and when the dialogue box comes up make sure you check the "Actual Size" option. I also check the "Print in Grayscale (Back and White) option too because it saves on ink and prints quicker

Once printed, check with a ruler that the box is indeed 3" x 3" in size. If yes, then you can carry on printing the remainder of your pattern.
Step 2
Cut out your pattern pieces using the black line as a guide, make sure you are really accurate
Step 3
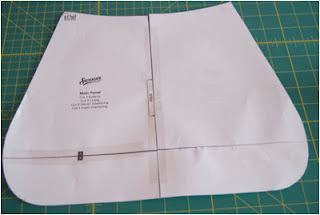
Join the pieces together with tape - again be really accurate, butt up each piece and match the letters or sometimes shapes
A lot of patterns including Ethel are designed so that you cut out your fabric on the fold
I prefer to print 2 sets of pattern pieces and tape them together so I have the whole pattern piece. I find this is more accurate when cutting out my fabric, and it's really useful when it comes to pattern matching your fabric


Once you've taped all your pattern pieces together, you'll be ready to cut out your fabric


No comments:
Post a Comment